Blog
20 things everyone should know how to repair
Oct 27, 2023.

Hey there! Ever wished you could be the hero of your house when things go wonky? Well, get ready for a crash course in DIY repairs – it’s easier than you think! We’re talking about 30 fixes that can turn you into a home superstar.
From stopping leaky faucets to quieting noisy doors, we’ve got your back. This guide is like your secret weapon toolkit for everyday home glitches. So, let’s skip the stress and dive into the cool world of fixing stuff yourself. You got this!
Safety First!
First things first, always keep safety in mind. Before you start any DIY project, make sure to understand what you’re doing. Wear safety gear like gloves and glasses, and use tools you know how to handle. If you’re working with electricity, turn off the power first and check with a tester. Set up your ladder securely and make sure your workspace is well-lit. Keep a first aid kit nearby, take breaks, and be aware of potential hazards.
Leaky Faucet
A persistent drip can be maddening. Learn to tighten loose connections or replace a worn-out washer to stop that annoying leak in its tracks.
Ah, the infamous drip-drop symphony of a leaky faucet – enough to drive anyone up the wall! But fear not, my friend, because banishing that maddening sound is simpler than you might think. Here’s the scoop: if you’re dealing with a persistent drip, the likely culprits are loose connections or a worn-out washer. It’s like the faucet’s way of saying, “I need a little attention, please!”
Now, grab a wrench (or any tool superhero you have in your toolkit), and let’s get to work. First, check for loose connections. Sometimes, all your faucet needs is a little tightening up. Imagine it’s a hug for your plumbing – not too tight, just snug enough to stop the drip dance.
If that doesn’t do the trick, don’t worry – we’ve got another trick up our DIY sleeve. It’s time to replace that tired, worn-out washer. Think of it like changing the tired shoes on your faucet. A new washer means a better seal, and voila, no more drip-drop soundtrack.
So there you have it – a friendly DIY mission to stop the annoying faucet serenade. Give it a try, and you’ll not only silence the drip but also earn yourself a well-deserved badge in the art of household heroics. Happy fixing!
Ceiling Fan Wobble
A wobbly ceiling fan can be a cause for concern. Ensure the fan is securely mounted and blades are balanced. You can use a fan balancing kit to fix wobbling issues, ensuring a quiet and steady rotation.
Ever noticed your ceiling fan doing a little wobble dance? No need to worry – we’ve got the moves to straighten things out! A wobbly fan can be a bit of a head-scratcher, but fear not, because fixing it is easier than you might think.
First off, let’s play detective. Make sure your fan is securely mounted – think of it as giving it a reassuring hug. Check if the blades are all in balance, like a well-choreographed dance troupe. Sometimes, all it takes is a little tightening here and there to bring your fan back to its stable, wobble-free glory.
But wait, there’s more! If the wobble persists, enter the superhero of ceiling fan stability – the fan balancing kit. It’s like a secret weapon that can turn your wobbly fan into a silent, steady marvel. Just follow the kit’s instructions, and soon your fan will be spinning like a pro, with no wobbles in sight.
So, there you have it – a friendly guide to tackling the wobbly fan mystery. With a bit of attention and maybe a balancing kit, you’ll have your ceiling fan back to its smooth, quiet rotation.
Frayed Electrical Cord

Ever come across a frayed electrical cord and thought, "Yikes, that doesn't look safe"? You're spot on! Frayed cords aren't just an eyesore; they can be downright risky. But fret not – you can be the superhero of electrical safety with a simple DIY fix.
Picture this: you spy a frayed cord, and your DIY instincts kick in. First things first, ensure the device is unplugged – think of it as giving it a little nap before the rescue. Now, grab either electrical tape or heat shrink tubing – your trusty sidekicks in this mission.
For the tape method, gently wrap the frayed area, creating a snug little cocoon for the cord. It’s like giving your cord a stylish band-aid! If you opt for heat shrink tubing, slide it over the frayed section and use a hairdryer to shrink it into a protective layer – it’s like magic!
And there you have it – a friendly guide to saving your cords from potential hazards.
Dripping Showerhead
A dripping showerhead not only wastes water but can be a nuisance. Fix this common issue by replacing the showerhead washer or using thread seal tape to create a tight seal, providing a more enjoyable and water-efficient shower experience.
Ever been annoyed by a dripping showerhead? It’s like a constant reminder that your water is literally going down the drain. But don’t stress – we’ve got a simple solution to turn your shower into a blissful, drip-free haven.
So, the culprit behind this watery symphony is often a worn-out showerhead washer. Think of it like the superhero cape that ensures a water-tight seal. First things first, turn off the water – your showerhead deserves a little break. Now, unscrew the showerhead and take a peek inside.
If you spot a worn-out washer, it’s time for a quick fix. Replace it with a new one, and voila – your showerhead is back in action. But here’s a pro tip: if you don’t have a spare washer, grab some thread seal tape. Wrap it around the shower arm threads before reattaching the showerhead – it’s like giving your shower a comfy blanket to snuggle into.
And there you have it – a friendly guide to saying goodbye to the annoying drip-drop dance. Not only will you save water, but you’ll also enjoy a more peaceful and efficient shower experience. So go ahead, fix that dripping showerhead and let the soothing water flow without the unnecessary soundtrack!
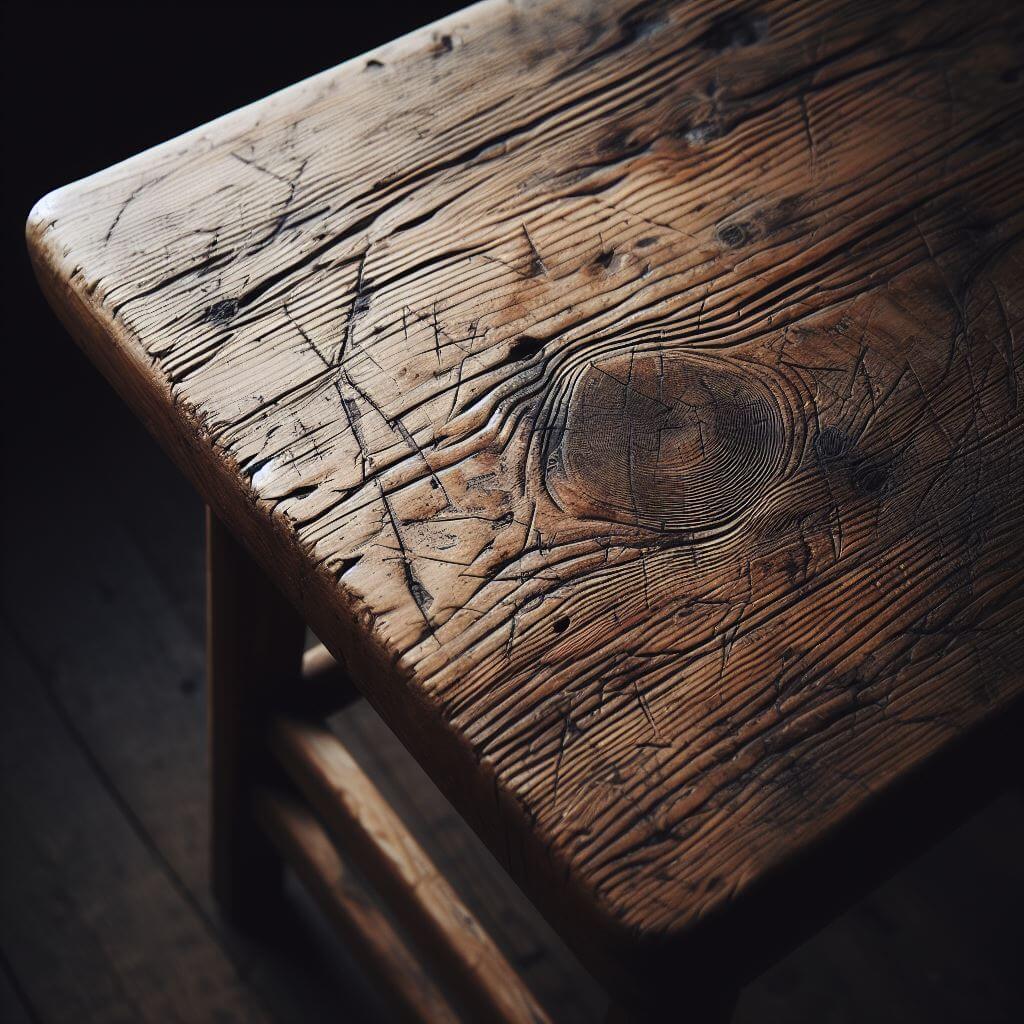
Scratched Wood Furniture
Unsightly scratches on wooden furniture can be distressing. Easily remedy this by applying a mixture of equal parts vinegar and olive oil, wiping away scratches and restoring your furniture's natural shine.
Stuck Sliding Door
A sliding door that refuses to glide smoothly is a common annoyance. Solve this by cleaning the tracks thoroughly and applying silicone-based lubricant, ensuring your sliding door operates effortlessly.
Ever wrestled with a sliding door that seems determined to stick in place? It’s a common frustration, but fear not – we’ve got a super simple fix that will have your door sliding like it’s on air.
Think of it as a spa day for your sliding door. The first step? Give those tracks a thorough cleaning – it’s like a refreshing shower for your door’s pathway. Clear away any debris, dust, or gunk that might be causing the hiccup.
Now, for the grand finale: the magical touch of a silicone-based lubricant. Apply it generously to the tracks, and watch as your sliding door rediscovers its smooth moves. It’s like giving your door a pair of sleek, gliding shoes.
This easy DIY solution not only banishes the annoyance of a stuck sliding door but also ensures it operates effortlessly. So, go ahead, pamper your sliding door with a little cleaning and lubrication, and enjoy the newfound ease of movement in your living space!
Peeling Wallpaper
Peeling wallpaper can make a room look neglected. Bring back charm by reattaching loose sections with wallpaper adhesive, ensuring your walls stay visually appealing.

Dealing with peeling wallpaper in your room? No worries! It happens, but you can easily restore the charm by reattaching loose sections with some trusty wallpaper adhesive. It’s like giving your walls a quick makeover, ensuring they stay visually appealing and free from that neglected look. Simply apply the adhesive to the loose areas and press them back into place, creating a refreshed and well-kept appearance. This simple DIY solution will have your room looking fabulous in no time!
Loose Cabinet Handles
Loose cabinet handles not only detract from the aesthetics but can also be frustrating. Tighten them up with a screwdriver to keep your cabinets looking sharp and functional.
Dealing with loose cabinet handles that not only mess with the aesthetics but also annoy you? No need to stress! Easily tighten them up with a trusty screwdriver to keep your cabinets looking sharp and functioning smoothly. It’s a quick and simple DIY fix that ensures your handles stay securely in place, maintaining both the visual appeal and functionality of your cabinets. So, grab that screwdriver and give your cabinets the attention they deserve – a little tweak that makes a big difference!
Flickering Light Bulbs
Flickering lights can be more than a mere annoyance; they can indicate an issue. Check the bulb's fit, tighten it if loose, and inspect the socket for any signs of wear. Addressing these concerns can ensure consistent and reliable lighting in your home.
Drafty Windows
Windows allowing drafts can impact your home's energy efficiency. Combat this by applying weatherstripping or using caulk to seal gaps, keeping your living space more comfortable and reducing energy costs.
If you’ve ever felt a bit too much breeze coming through your windows, it’s time to tackle those drafty issues. Drafts not only affect your home’s coziness but also mess with your energy bills. The good news? You can take charge! Combat those drafts by applying weatherstripping or using caulk to seal gaps around your windows. Think of it as giving your home a warm and snug sweater. This simple DIY solution not only boosts your home’s comfort but also cuts down on energy costs, ensuring a more efficient and cozy living space. So, roll up your sleeves, grab some weatherstripping or caulk, and let’s bid farewell to those pesky drafts!

10 More Ideas to Empower Your Home Projects
Cabinet Door Hinge
When cabinet doors start sagging or refusing to close, it's likely a hinge issue. Tighten loose screws or replace worn-out hinges to restore smooth operation and maintain the aesthetic appeal of your cabinets.
Clogged Drain
Say goodbye to slow drains with a simple mixture of baking soda and vinegar. It's a chemical-free solution that keeps your pipes happy.
Say goodbye to those slow-drain blues by unlocking the magic of a kitchen-cabinet concoction: baking soda and vinegar. This duo, reminiscent of a homemade potion, is your ticket to a drain that flows as smoothly as a serene stream. The process is as simple as can be – start by generously pouring around half a cup of baking soda into the trouble zone. Then, like a mad scientist in your kitchen laboratory, add a cup of vinegar and let the fizzing symphony commence. This chemical-free marvel needs a brief 10-15 minutes to do its unclogging dance. Picture it as your pipes getting a little spa treatment. Finish off this DIY ritual with a hot water chaser to wash away any remnants of the clog-busting magic. Not only does this method bring instant relief to your sluggish drains, but it’s also a preventive charm, keeping your pipes content and future clogs at bay. So, bid farewell to drain dilemmas and welcome the tranquility of smoothly flowing plumbing into your home!
Hole in the Wall
Accidents happen. Patch up those unsightly holes with a wall repair kit. It's easy, quick, and leaves your walls looking flawless.
Accidents are part of life, but when they leave unsightly holes in your walls, don’t fret – we’ve got the perfect solution. Enter the superhero of wall repairs: the wall repair kit. It’s like having a handy sidekick that makes fixing holes a breeze. The process is as easy as pie, quick as a wink, and the result is walls that look as good as new. Simply follow the straightforward instructions included in the kit, and before you know it, that eyesore of a hole will be a distant memory. It’s a DIY dream come true – no need to stress about wall imperfections when you’ve got a trusty wall repair kit at your service. So, whether it’s a little accident or just wear and tear, patching up those holes is a cinch, leaving your walls flawless and your living space looking as pristine as ever!
Broken Tile

Restore the beauty of your floor or wall by replacing a broken tile. With the right tools and a bit of patience, you can achieve a professional-looking result.
When a broken tile threatens the beauty of your floor or wall, fear not – a simple and satisfying solution awaits. Grab the right tools and a sprinkle of patience, and you’ll be on your way to achieving a professional-looking result that breathes new life into your space. It’s like giving your floor or wall a makeover! Replacing a broken tile may sound like a daunting task, but with a bit of know-how, it becomes a DIY project that not only restores but enhances the aesthetic appeal of your home. Picture it as an artistic endeavor – a chance to showcase your handy skills and transform that unsightly gap into a seamless, polished finish. So, don your DIY hat, gather your tools, and get ready to witness the magic of a repaired tile, bringing back the charm and elegance to your living space!
Squeaky Doors
Put an end to that annoying creak every time you open a door. A little lubricant on the hinges or a strategically placed doorstop can work wonders.
Running Toilet
A constantly running toilet is not just irritating; it's wasteful. Learn to adjust the float or replace a faulty flapper for water bill savings.
Fed up with the never-ending symphony of a running toilet? You’re not alone, and the good news is, there’s a straightforward solution. Tackling a constantly running toilet isn’t just about eliminating the irritation – it’s also a smart move for saving on your water bill. Arm yourself with a bit of know-how: learn to adjust the float or replace a pesky flapper. Think of it as giving your toilet a little tune-up, ensuring it only flushes when it’s supposed to. With these simple adjustments, you’ll bid farewell to the endless hum of a running toilet and welcome a more water-efficient and budget-friendly bathroom. It’s a win-win – silence for your ears and savings for your wallet!
Leaky Roof
Don't let a leaky roof rain on your parade. Seal small leaks with roofing cement to prevent water damage and keep your home dry.
Don’t let a leaky roof put a damper on your day. If you spot those pesky drips, fear not – there’s a simple and effective solution. Grab some roofing cement and get ready to play hero to your home. By sealing up those small leaks, you’re not just preventing water damage but also ensuring your home stays cozy and dry. Picture it as a shield for your home, blocking out the raindrops and maintaining a snug atmosphere inside. So, whether it’s a drizzle or a downpour, you can rest easy knowing your leaky roof won’t rain on your parade. Sealing those leaks is like giving your home a sturdy umbrella – a small effort that goes a long way in keeping your living space safe and dry.
Broken Light Switch
When the lights flicker, it might be time for a switch. Turn off the power, replace the old switch, and bask in the glow of your successful repair.
If your lights have been doing an impromptu disco dance with flickers, it could be a sign that it’s time for a switch – literally! Fear not, as fixing a flickering light is as easy as flipping a switch. Start by turning off the power, because safety first. Then, with a bit of DIY prowess, replace that old switch with a shiny new one. It’s like giving your lights a VIP pass to a smoother, uninterrupted glow. With the flickering conquered, you can bask in the warm, steady radiance of your successful repair. So, when your lights start to mimic a dance floor, consider it a cue to swap out that switch, and let your living space revel in the consistent brilliance it deserves.
Unclogging a Toilet
The dreaded clogged toilet is no match for a plunger or a trusty toilet auger. Handle the situation with confidence and a bit of elbow grease.
Facing the dreaded clogged toilet? No need to panic – consider it a challenge easily conquered with the right tools and a touch of determination. Arm yourself with a plunger or a trusty toilet auger, and tackle the situation with confidence and a bit of good old elbow grease. It’s like engaging in a friendly battle with the clog, and you’re bound to emerge victorious. Picture it as a DIY feat that not only clears the blockage but also leaves you with a sense of accomplishment. So, when the toilet declares a clog war, grab your tools, roll up your sleeves, and face the challenge head-on. With a plunger or an auger by your side, you’ll soon restore the peace in your bathroom kingdom.
Stuck Window
Enjoy the breeze by freeing up stuck windows. A touch of lubricant or beeswax can make a world of difference.
Embrace the breeze and bid farewell to stuck windows with a simple solution. All it takes is a touch of lubricant or a bit of beeswax, and you’ll transform that stubborn window into a smoothly gliding masterpiece. It’s like giving your window a breath of fresh air – and allowing you to enjoy the outdoors without the hassle. With this quick and easy fix, you’re not just freeing up a stuck window; you’re opening up possibilities for a more comfortable and pleasant living space. So, when your window decides to play hard to open, reach for the lubricant or beeswax, and let the refreshing breeze flow effortlessly through your home. It’s a small adjustment that makes a world of difference in enhancing your living experience.
Wrapping up this Guide to Addressing Everyday Home Challenges
In the world of fixing things at home, we’ve shared some simple tricks to help you handle common problems. From leaky faucets to sticky windows, we’ve got your back. Think of these tips as tools in your virtual toolbox, ready for whenever you need them.
By showing you these straightforward fixes, we want to make DIY repairs less mysterious and give you the confidence to tackle issues around your home. Fixing a leaky faucet is like giving your plumbing a mini spa day. Dealing with a clogged drain? Use a mix from your kitchen. A squeaky door? A little lubricant will do the trick. These aren’t just solutions – they’re chances for you to connect with your home, understand how it works, and feel proud of what you can do.
And it’s not just about fixing things. It’s about the satisfaction of figuring things out, gaining confidence in troubleshooting problems, and the joy of seeing an annoying issue disappear. This guide is more than just advice; it’s an invitation to approach challenges with curiosity and a positive attitude.
Every drip, squeak, or blockage is a chance to learn and become more in control of your home. So, armed with these simple tips and a newfound sense of confidence, go ahead and turn your living space into a cozy, well-functioning space. Whether you’re a DIY pro or just getting started, remember that every fix is a step toward creating a home that shows your care, cleverness, and the happiness of a job well done. Happy fixing!